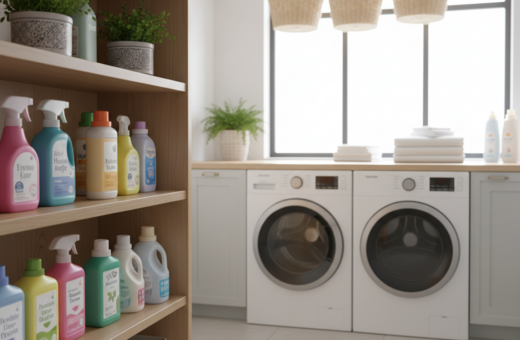
Implementing a pegboard system in the home provided an efficient way to manage small items while making the most of limited storage space. It offered a clear way to keep tools, baskets, and shelves within reach and off the floor.
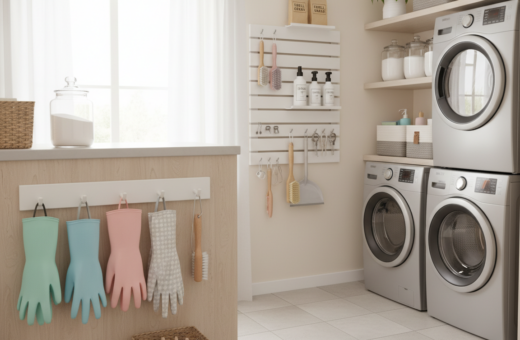
The approach worked well in a tight laundry room and other busy spots in a house. By adding hooks and accessories to a wall, people transformed cluttered corners into usable space.
Professional organizers often recommended mixing shelves, hooks, and small baskets so every inch served a purpose. This DIY method let homeowners create a practical style that matched their taste while keeping daily tasks simple.
These layouts made it easy to find items and cut routine time. They were durable, adaptable, and a straightforward way to keep a tidy home.
Benefits of Pegboard Laundry Organization
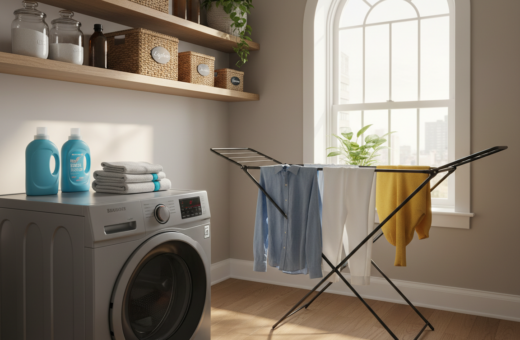
Mounting a customizable board transformed cramped service rooms into efficient work areas. It reclaimed floor space by moving boxes and bottles up onto the wall, making the room feel larger and safer.
Homeowners used this method to create a dedicated zone for detergents and small tools. Hooks and small baskets kept essentials visible and within reach. This setup cut the time spent hunting for items and made sorting quicker.
The system also encouraged consistency. Once mounted, the layout stayed tidy through busy weeks. People found it easier to track stray items that had previously vanished in cabinets.
- Reclaimed floor space for folding or movement.
- Dedicated spots for accessories reduced clutter.
- Versatile hooks allowed quick layout changes as needs evolved.
The result was a pegboard laundry room that felt deliberate and professional. It simplified chores and kept small items under control without costly renovations.
Planning Your Laundry Room Layout
Begin with a simple sketch of the wall to visualize where storage will live. This step helps clarify placement before any materials are purchased.
Assessing available wall space means measuring height and width, checking for outlets, and noting door swing. Sara from Sincerely, Sara D. advised finding the center of the wall to pick the ideal location. Measure twice so a standard 4′ x 8′ sheet will fit or be trimmed to suit.
Assessing Available Wall Space
In a small room every inch matters. The DIY Mommy showed that even compact areas can gain valuable storage with a well-placed board.
Determining Storage Needs
Inventory the laundry supplies and classify items by weight and frequency of use. Light items work well on hooks; heavy bottles need shelves or ledges.
- Find the wall center to guide placement.
- Count tools and containers to choose hooks or shelves.
- Create a dedicated workspace by leaving a clear area for folding or sorting.
- Confirm the 4’x8′ sheet fits and allows room for daily essentials.
With a clear plan, installing pegboards becomes a straightforward DIY way to add functional storage and an efficient workspace to the laundry room.
Essential Tools and Materials for Installation
Before cutting wood or painting, gather the right supplies for a smooth install.
Start with six furring strips (1″ x 2″ x 8″) to build a simple frame that holds the pegboard away from the wall. A chop saw makes quick, accurate cuts so each strip fits the space in the room.
Essential tools include a hammer, nail gun, and an electric screwdriver. These items secure the frame and attach accessories with confidence.
- Use primer and paint to protect the board and match your laundry room style.
- Choose a mix of hooks and shelves that fit the holes to expand storage for common laundry items.
- Have a paint roller, screws, and extra wood on hand to finish cleanly and fast.
“Good preparation cuts install time and reduces mistakes.”
For inspiration on layouts and accessory ideas, see creative pegboard ideas. With the right tools and materials, the project feels like a professional upgrade to the home.
Mounting the Pegboard Frame
Begin by tracing a precise 4’x8′ outline so the frame sits squarely and looks professional. A level makes this quick and prevents a crooked install later.
She marked the rectangle on the wall, then located studs along that line. Strategically placing furring strips over studs is the best way to support heavy items and keep the board rigid.
Ensuring Proper Stud Alignment
Sara used a nail gun to fasten the furring strips to the studs for a solid base. After the strips were up, the majority of screws were drilled directly into studs to lock the frame in place.
- Draw the 4’x8′ perimeter with a level so the board is perfectly straight.
- Place strips over studs to bear weight from hooks and shelves.
- Use a nail gun for the frame, then secure with screws into studs.
- Drill holes for screws carefully; aim most screws into studs for max stability.
This method creates a professional-grade storage space in the laundry room. Adding extra furring strips increases support and keeps pegboards sturdy when loaded with tools and accessories.
Securing the Board to the Wall
Final alignment and fastening make the installation durable and safe.
They began by confirming stud locations above the board and marking them clearly. This prevented guesswork when driving fasteners through the panel.
After the frame was secure, the panel was positioned and a quick dry fit checked that all holes lined up with the underlying strips. That step helped avoid crowded or misaligned fasteners.
Attach the pegboard using screws, aiming most into studs for strength. Using enough screws stops the pegboards from bowing or pulling away when loaded.
- Align holes with the frame for a seamless, professional look.
- Drive screws into marked studs whenever possible for maximum support.
- Double-check each screw is snug so the board stays flush and stable.
Customizing Accessories for Style and Function
Custom accents and smart choices turn a simple board into a stylish, high-functioning wall unit. Small details bring cohesion and make the space easier to use every day.
Selecting Hooks and Baskets
Choose hardware that matches your routine. Valspar’s spray paint worked well on hooks and hangers to create a consistent look across the room.
For heavier items, pick sturdy baskets and anchors. Rust-Oleum Oil Rubbed Bronze gave metal baskets an industrial, durable finish that complements wood accents.
Painting for Aesthetic Appeal
Sara primed the panel with Zinsser Primer 123, then used Valspar Signature Paint + Primer in Coconut Milk for a bright, clean surface.
Painting accessories to match the wall ties the whole workspace together. Even a pull-down ironing board can be spray-painted to blend with the design.
Adding Personalized Labels
Labels make the layout intuitive. A Silhouette Cameo or iron-on lettering helps mark where laundry supplies and tools belong.
“Clear labeling reduces search time and keeps daily tasks smooth.”
- Use painted hooks to create a unified color story.
- Finish baskets in a contrasting metal tone for texture and durability.
- Stain any exposed wood to match trim or shelving.
For more creative layouts and ideas, see pegboard ideas.
Understanding Weight Capacities and Safety
Knowing weight limits keeps a wall-mounted system safe and dependable.
Installers should plan loads before adding accessories. For drywall installation, the recommendation is 100 lbs per panel. When panels are secured into studs, the rating rises to 200 lbs per panel.
Individual hardware has limits too. Hooks that engage two slots hold about 10–15 lbs. Single-slot hooks are rated near 5–10 lbs.
- Shelf assemblies: 10–20 lbs evenly distributed.
- Plastic bins: roughly 2 lbs each to avoid stress.
- Heavier items: place ironing boards and tools close to the base of a hook or shelf, not at the tip.
Proper weight distribution across the face of the panel prolongs the life of the wall storage. If any load seems marginal, contact the manufacturer for specific guidance to keep the setup safe and secure.
“Always verify load ratings before adding heavy items and adjust placement to reduce stress.”
Conclusion
A well-planned wall system turns wasted vertical space into a useful, stylish zone. It helps the room feel larger and makes daily tasks faster by keeping essentials in clear view.
By following the steps above, a custom pegboard setup transforms a laundry room and other areas of the home into efficient storage space. Proper installation ensures the pegboards stay secure and hold supplies safely.
These simple layouts suit beginners and seasoned DIYers alike. The result is a professional style that reduces clutter and speeds routine chores. Share a photo or ask questions in the comments to inspire others and grow the community of home organizers.