The author transformed a cramped area into a functional laundry room on a tight budget. The project cost about $550 and focused on smart storage, durable finishes, and everyday efficiency.
They used the room every day to manage constant toddler laundry, so the redesign had to be fast, safe, and easy to use. Planning emphasized clear zones, quick access, and a tidy flow.
The result proved a house can gain high-end looks without a huge cost. The post includes a full list of sources and affiliate links at the bottom of the blog.
This before-and-after story aims to inspire readers to try their own project, whether they follow a DIY plan or hire help. The documented steps show how modest investment doubled storage and made the room work for daily life.
Assessing Your Current Laundry Closet Layout
After 30 months of frustration, the author decided to evaluate the existing laundry room with a clear checklist. They wanted to know what failed, what worked, and where daily tasks stalled.
Start by emptying the space. Clearing shelves and bins revealed what got used and what collected dust. This step made it obvious which items belonged back and which were pure clutter.
Brandon began the physical work by removing the bi-fold doors. Taking off those doors immediately opened the area and removed a point of constant irritation.
The team also chose playful wallpaper for the back of the closet to make the room feel welcoming. That decorative choice boosted morale and made the area feel intentional.
- Identify problem zones that block access or storage.
- Separate essentials from rarely used items.
- Note worn hardware like doors that hinder function.
Thorough assessment sets a clear scope for design and helps avoid wasted time and money later.
Planning Your Small Laundry Closet Makeover
The project began with a few mood boards and precise appliance dimensions to avoid costly mistakes.
Design Inspiration and Mood Boards
They gathered photos to lock in a cohesive style and color story. Hunters Pointe paint and patterned wallpaper guided the final look.
- Color and light: pick paint that reads bright and warm on the walls.
- Material cues: add wood shelves and cabinet fronts for a homey feel.
- Storage ideas: plan spots for clothes, cleaning items, and open shelving.
Measuring for Appliances
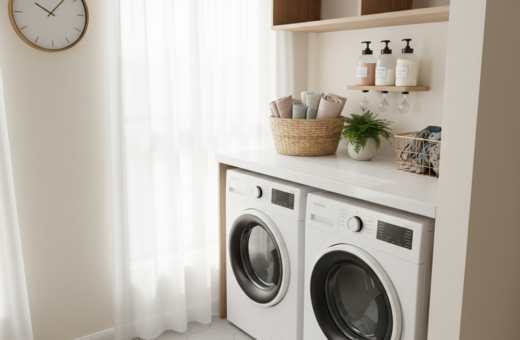
Careful measuring prevented misfits. The author partnered with LG and installed a new washer and dryer plus the LG Sidekick, which fits under the main washer.
They confirmed clearance for doors and cabinet depth and checked wall dimensions for custom cabinets and shelves.
Tip: LG ran a promotion where a washer and Sidekick pair started at $999 through July 13th, making the decision easier during the planning phase.
Clear planning saved time and avoided surprises during the build.
Structural Improvements and Door Solutions
A rundown of the structural fixes shows how a few targeted changes cured everyday friction at the entry to the utility area.
Replacing Bi-fold Doors
The author removed failing accordion panels after two attempts. The frames were not square, and the folding systems bound and sagged.
Standard doors solved clearance problems and provided a cleaner look for the laundry room. They proved more reliable than accordion doors when frames deviated from factory dimensions.
- Standard doors eliminated constant rubbing and improved access.
- Fixing the frame kept hinges aligned and reduced noise.
- Adding wallpaper behind the washer and dryer made the room feel finished when the doors were open.
Trim was another issue. The author found the original floor molding thicker than the trim, which bothered them. They ripped a scrap 1×4 to match the profile and installed it to tie the opening to the rest of the house.
Proper trim and a true-to-frame door install made the closet function correctly and look integrated. These structural moves turned a finicky entry into a durable, professional solution.
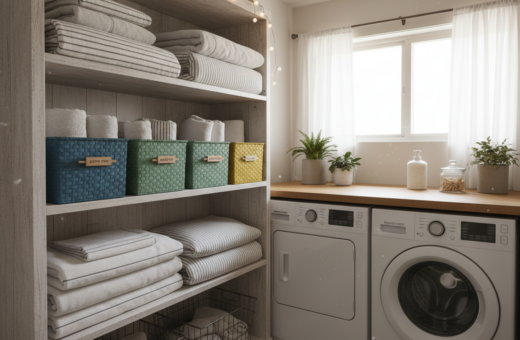
Maximizing Vertical Storage Capacity
Rethinking height and reach unlocked far more capacity than new floor units would. The team treated the walls as primary storage, stacking function above eye level to keep the floor clear.
Installing Custom Wall Cabinets
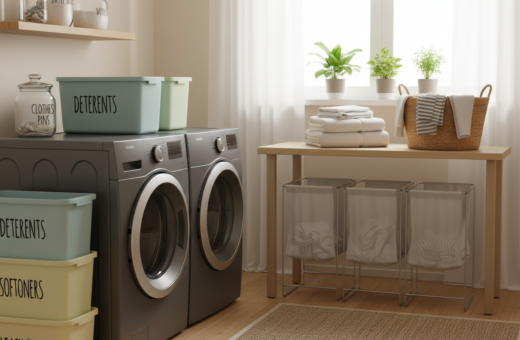
They built two custom cabinets for $220 and painted them October Mist by Benjamin Moore. These units hide cleaners, detergents, and seasonal items.
Hidden storage cut visual clutter and made the washer and dryer area look tidy without extra bulk.
Adding Floating Shelves
A thin floating shelf was mounted above the appliances to save depth and leave room for a hanging rod. This created a spot for baskets and daily drop-off items.
Twenty square feet of peel-and-stick tile ($115) on the back wall elevated the look while protecting the walls from splashes.
Utilizing Door Organizers
Over-the-door racks kept mops, brooms, and lighter tools off the floor. The author also added a standing wood shelf over the machines to boost capacity for baskets.
Tips:
- Use every inch of wall and the back of doors for vertical storage.
- Choose a slim shelf when you need hanging space for clothes.
- Swap to a brighter ceiling light with a vintage bulb to improve style and visibility.
Aesthetic Upgrades and Finishing Touches
Careful selection of paint, hardware, and baskets pulled the design together and made the laundry room feel finished.
The walls were painted Alabaster by Sherwin Williams to keep the color bright and neutral. This single choice reflected light and made the space read larger and cleaner.
They dressed the cabinets with brass knobs to add a custom, high-end style. Coordinating wood accents and the wallpaper on the back wall tied the room into the rest of the house.
Organization got a lift with a wicker laundry basket and white rope baskets for supplies. A runner or a small tray set was added to make the area feel curated and intentional.
Simple trim updates and a new ceiling light completed the look. Updated doors and a warmer bulb improved function and created a welcoming finish.
These finishing touches prove that modest investments in paint, hardware, and lighting can transform a utility area into a polished, usable room.
Managing Your Project Budget and Materials
The author kept the total cost near $550 by treating every purchase as a deliberate choice. They prioritized reusing what they had and buying only where a visible upgrade mattered most.
Sourcing Affordable Supplies
They used scrap wood and leftover paint to build shelving and trim. This lowered labor needs and cut material cost without sacrificing the final look.
Peel-and-stick tile added a high-end feel for about $115. Buying a thin floating shelf, a hanging rod, and simple hardware gave the room function and style at low cost.
DIY work saved more than the price of prebuilt cabinets. By doing the install themselves they avoided the markup on custom cabinets and kept the project manageable in one weekend.
- Organized cleaners and cleaning tools in glass jars and baskets to keep things visible and reusable.
- Shared links to all materials in the blog so readers can source the same items and match cost expectations.
- Careful planning ensured each dollar added storage and resale value to the home.
Conclusion
This project proves that focused changes can turn a tight area into a bright, useful zone. By doubling usable storage and improving light and layout, the team made daily chores easier and faster.
The result is an organized room that welcomes tasks and keeps clothes in order. Careful planning and budget choices meant the project stayed affordable and durable. Homeowners can adopt these ideas and enjoy a cleaner, more efficient house every day.
Readers who want step-by-step details and product links can explore the full laundry room makeover post. Smart storage and simple upgrades are all it takes to reshape a closet into a practical, lasting space.