Creating a functional laundry room starts with simple steps that make shared areas easier to use for everyone. Thoughtful planning helps households save time and reduce stress.
They can adopt a clear design that keeps supplies visible and within reach. A consistent style for storage turns messy rooms into calm, usable areas.
Practical methods help family members find what they need fast. When each space has a purpose, chores move faster and the home feels more organized.
Key takeaways:
– A simple system saves time and keeps shared spaces tidy.
– Consistent storage style makes daily tasks less overwhelming.
Assessing Your Laundry Room Needs
Observe the flow of people and items through the space for one full day before making changes. This helps identify where clutter collects and which zones must work hardest.
Start simple: gather like items into piles to see what storage each person needs. If the area doubles as a mudroom, look for spots to park shoes, coats, and bags without blocking walkways.
- Note daily drop-off points and busiest times.
- Count how many baskets or lockers are needed for family gear.
- Decide on a consistent style for storage that matches the home’s look.
“A short audit reveals simple fixes that save time each week.”
Finding the right shelf over the washer and dryer or placing a dedicated basket for each person makes it easier to organize laundry the rest of the day. Small, intentional choices improve overall organization and keep the space from feeling chaotic.
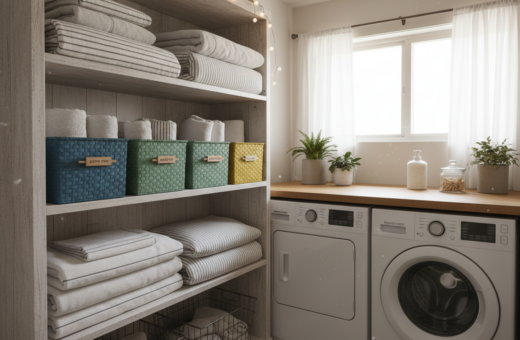
Essential Laundry Room Labeling Ideas for Shared Spaces
Simple visual cues help everyone sort items faster and with less fuss. Clear markers save time and reduce daily confusion in a shared area. Small, consistent choices create a calmer atmosphere and make chores run smoother.
Minimalist Icon Strips
Neat vinyl lettering or small icon strips placed above baskets create a tidy, professional look. They keep the display consistent and help each person find the right basket at a glance.
Tip: Use simple icons for socks, whites, and delicates so kids and guests can follow the system without reading detailed text.
Chalkboard and Interchangeable Panels
Magnetic or chalkboard panels let the household swap labels like “Whites” or “Darks” in seconds. This flexible approach supports seasonal changes and varied loads.
Placing durable labels on containers ensures every dryer ball, soap bottle, or stain remover has a home. The result is less clutter and a cleaner look overall.
- Faster sorting: Visible labels help everyone know where items belong and save time.
- Calm atmosphere: Minimal vinyl tags and uniform style keep the space feeling orderly.
- Flexible decor: Chalk panels let users adjust the display as needs change.
“Consistent markers make shared spaces easier to use and maintain.”
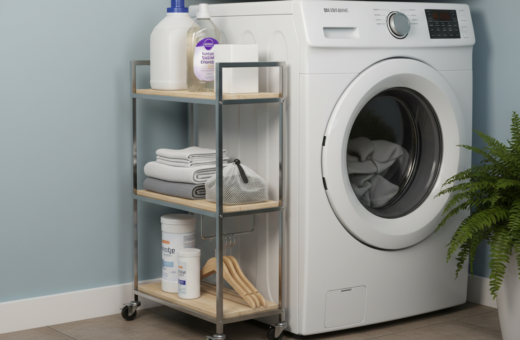
Selecting Durable Materials for High-Humidity Environments
Choose materials that resist steam and spills to keep labels readable for years.
Waterproof vinyl and acrylic panels are the top choices when moisture is a constant factor. They resist detergent, steam, and frequent wiping, so text stays crisp and edges do not peel.
Choosing Waterproof Vinyl and Acrylic
Prioritize waterproof vinyl or acrylic as the main material for any shared laundry area. These options maintain a professional style and protect identification from fading.
Metal tags or hard acrylic panels work well near machines where steam concentrates. Every basket and container should use a surface that is easy to clean and won’t trap moisture.
- Waterproof vinyl will not peel or fade under regular use.
- Acrylic panels resist scratches and stand up to steam exposure.
- Metal tags add durability where heavy handling occurs.
“Investing in the right materials keeps the space functional and visually appealing.”
Step by Step Guide to Creating Custom Vinyl Labels
Begin with a tidy bench and a precise Design Space file so cuts fit every basket and container. Good prep saves time and reduces wasted material.
Preparing Your Design Space File
Measure each basket and container, then create a matching file in Design Space. Adjust the text, colors, and sizes to ensure labels sit level and look balanced.
Pro tip: Save a copy of the file for small changes later. This makes seasonal changes or font swaps fast.
Cutting and Weeding Techniques
Use a Cricut Maker with a 12×24 Standard Mat for larger label designs. Cut at the recommended vinyl setting and keep a clean mat to avoid slips.
After cutting, use a sharp weeding tool to remove excess vinyl. Clean edges produce a crisp, professional finish for laundry room labels.
Applying Labels with Transfer Tape
Peel the backing, apply transfer tape, and align the label on each surface. Press evenly and remove the tape slowly to avoid lifting small letters.
- Use transfer tape to place labels accurately on every basket.
- Work in natural light to check alignment and colors before final placement.
- Test one label per day when trying a new material to confirm adhesion.
“By following these steps, they can create professional-grade room labels that improve the atmosphere and save time.”
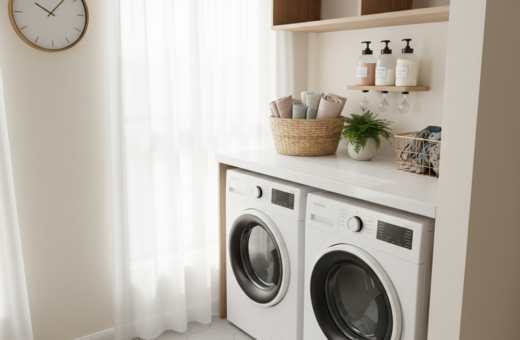
Incorporating Functional Decor to Streamline Workflow
Smart decorative choices bridge form and function to improve daily workflow. They make sorting and storage faster and give the space a calm, curated atmosphere.
Floating shelves and attractive baskets act as both storage and a visual guide. Placing a clear display piece above a work surface helps family members find the right spot for each task.
Use decor to hide supplies and cords so the room reads like part of the home’s design. This keeps the area tidy and reduces visual clutter, saving precious time during busy mornings.
- Position signs at eye level: mount displays around 150–160 cm from the floor per the 2010 ADA Standards for Accessible Design.
- Pick durable pieces: choose washable baskets and sealed shelves for humid conditions.
- Make a simple flow: group wash, dry, and folding zones so everyone follows the same route.
“A well-placed sign or display piece serves as a helpful tool to guide family members and keep the space productive.”
Advanced Tips for Managing Large Family Laundry Loads
Tackling big weekly loads calls for a system that scales with a busy household. A clear approach keeps cycles moving and reduces sorting time.
Utilizing color coded sorters helps families separate whites, darks, and colors at a glance. With seven people sharing chores, this method cuts confusion and saves a bit of time each day.
Utilizing Color Coded Sorters
Apply iron-on vinyl to sturdy fabric dividers using an EasyPress 2. This tool locks labels to the material so they endure frequent washing and handling.
Customize each basket or container with a distinct hue and a clear mark. That visual cue becomes a functional piece of decor and a reliable tool for kids and adults alike.
- Assign one color per family member or per fabric type.
- Use durable vinyl for labels to resist wear near the dryer.
- Keep three to five baskets close to the wash area for fast sorting.
“A well-designed sorter saves time and keeps the space calm even on busy days.”
Conclusion
A simple, consistent system turns a busy shared area into an efficient, calm corner of the home. Clear markers and durable materials reduce mistakes and save time for every family member.
By choosing waterproof vinyl or acrylic and applying easy-to-read labels, the team can keep the laundry process smooth and predictable. These choices help the room stay functional and attractive while protecting tags from steam and wear. Custom vinyl or iron-on options let users create personal and durable laundry room labels that match the home’s style.
Start the project today to make chores faster and less stressful. Consistent organization and well-made room labels help everyone pitch in, so the shared area runs more smoothly and lasts longer.