Paula’s makeover showed how a modest update can change a cluttered utility room into a calm, useful corner. She turned a small area that also served as a family bathroom into a practical work surface in just a few hours.
Many homeowners need a smart design that saves time and adds surface area without major work. A simple DIY project, like a custom folding table or a wall-mounted shelf, creates extra space and keeps tasks local to the room.
Smart choices—a slim countertop, a pull-down table, or a shallow shelf—make a small laundry layout feel larger. This guide explains practical ways to build a sturdy table that fits your layout and lasts for years.
Assessing Your Laundry Room Layout
Measure first: smart placement beats costly rework when creating a useful surface. A 24-inch wall section can be enough if the layout is precise. Take clear measurements of walls, appliance depths, and door swings before buying materials.
The National Kitchen and Bath Association recommends a 36-inch high surface for ergonomic comfort. In a small laundry room every inch counts, so note how washer and dryer doors affect clearances.
Paula started by removing bulky, unused cabinets to gain usable area in her combined bathroom and utility space. Choose moisture-resistant materials when the room doubles as a bathroom to avoid warping and stains.
- Confirm the new table won’t block traffic or appliance access.
- Check vertical space for a shallow shelf or a drop-down surface.
- Measure twice to prevent mistakes during installation.
For layout tips and layout examples, consult a guide on smart room layouts. Proper design is the simplest way to save time and create a long-lasting surface for daily tasks.
Creative Laundry Folding Station Ideas for Small Spaces
Smart surface solutions let homeowners reclaim square footage without a full remodel. This section presents three practical ways to add a reliable work area in tight utility rooms.
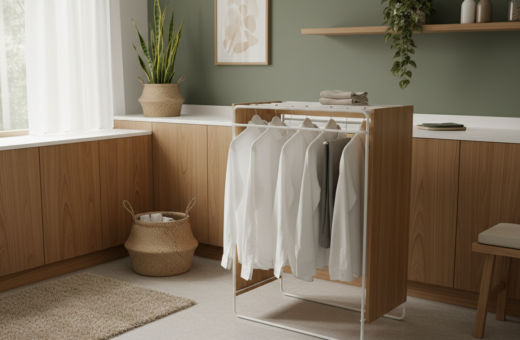
Wall-Mounted Drop-Down Tables
Wall-mounted drop-down tables fold flat when not used, freeing floor area in a small laundry room. They install on a stud-lined wall and can be locked upright to act as a slim shelf.
Paula used one so her combined bathroom and utility space stayed multi-purpose. Make sure there is enough clearance for baskets underneath and for appliance doors.
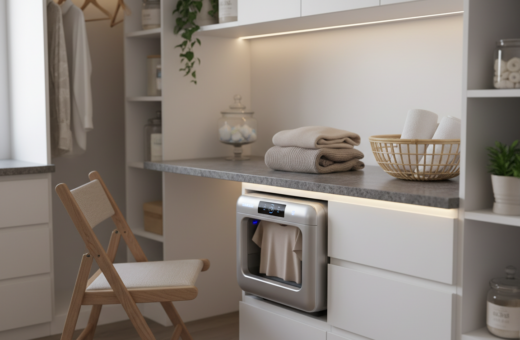
Over-Appliance Countertops
A seamless countertop across front-load machines creates a steady top for sorting and quick tasks. Use a moisture-resistant surface and measure appliance height to set an ergonomic top at about 36 inches.
This approach maximizes existing space and keeps the area tidy by providing open storage below for bins and baskets.
Pull-Out Cabinet Boards
Pull-out boards hide inside cabinetry and slide out when needed. They are ideal for homeowners who want a clean look while keeping a useful surface close at hand.
“A pull-out board gives the feel of a full table without committing floor space to legs or bulk.”
- Choose sturdy hinges or drawer slides rated for the expected weight.
- For DIY projects, place supports at the cabinet base to prevent sag.
- Check appliance height and clearance to ensure comfortable use.
Selecting Durable Materials for Your Folding Surface
Picking the right material makes the difference between a short-lived top and a reliable work surface. This short guide helps choose between common options and avoid mistakes that shorten a tabletop’s life.
Butcher Block vs Plywood
Butcher block offers warmth and a hard-wearing wood face that resists dents and looks attractive with a simple oil finish. It suits a countertop that will see heavy use and adds character to a small room.
Plywood is a cost-effective, stable choice that accepts edge banding for a neat finish. Use high-grade plywood and seal edges to keep moisture from causing delamination.
- Thickness: choose at least 3/4 inch for a table top to prevent sag under baskets.
- Finish: seal with a moisture-resistant coat when the room doubles as a bathroom or utility area.
- Edge care: sand all edges to avoid snagging delicate garments and to improve durability.
Paula used a 3/4″ MDF sheet as an affordable, smooth option for her DIY laundry table. While MDF is stable and easy to paint, she sealed it to protect against dampness.
Choosing the right material early saves time and keeps the design functional for years. Make sure the top, supports, and legs are rated for the expected loads before finishing the project.
Planning the Height and Ergonomics of Your Station
Ergonomic planning starts with one key choice: the correct height for your work surface. A 35-inch top often helps people stand comfortably, while 36 inches is the standard pro height.
Paula picked 35 inches because it reduced back strain during long laundry sessions in her small room. That slight change made tasks quicker and less tiring over time.
When you step to attach the table to the wall, use a level to make sure the surface is straight. Keep arms relaxed at the top so shoulders stay loose while you sort and fold.
- Allow enough length so baskets and storage fit beneath the table.
- Use a piece of plywood for a custom top to match the room width and depth.
- Make sure the legs are firmly secured to the base for stable use.
Plan the layout before cutting boards or buying fasteners. A little thought about height and storage will make this DIY project save time and keep the design durable for years.
Essential Tools for Building a Custom Folding Table
A compact toolset and the right fasteners turn a weekend build into a reliable work surface. Gathering quality hardware and measuring tools up front saves time and prevents mistakes in a small laundry room.
Paula relied on standard carpentry gear to finish her project quickly. A few key items make the difference when attaching a wall-mounted top.
Hardware and Fasteners
- Use heavy-duty hinges and carriage bolts so the table folds down smoothly; when you step to attach the hinges, make sure fasteners hit studs or use proper anchors.
- Paula recommends 2″ x 4″ boards for the frame and legs to support baskets and surface weight.
- Choose corrosion-resistant screws and washers for long life in a humid room.
Cutting and Measuring Equipment
- A miter saw and drill speed assembly make cuts and joinery fast; if you lack a table saw, most stores will cut boards to length.
- A reliable tape measure and a level are essential to ensure the table fits and sits perfectly horizontal at the chosen height.
- Store tools safely after the project to keep the space organized and ready for future projects.
For step-by-step tips on building a custom folding table, consult a custom folding table guide before you start.
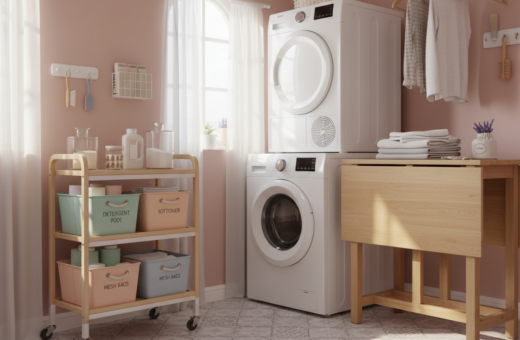
Maximizing Vertical Storage Around Your New Surface
Think upward: wall storage turns wasted airspace into practical, reachable storage. Adding shelves above the countertop keeps the surface clear and makes the whole room feel larger.
Install floating shelves a few inches above the new top for boxes, detergent, and everyday tools. Use wood or plywood boards sealed for moisture, and set the lowest shelf where it is easy to reach.
Wall-mounted hooks free the work surface by holding bags and lightweight baskets. Paula found that adding vertical storage helped her keep the small laundry area tidy even with five kids.
- Place frequently used supplies on the lowest shelf for fast access.
- Include a bright 4000K LED fixture to improve visibility while you sort and fold.
- Design shelves to match the countertop material and support weight with solid brackets.
“A well-organized layout with vertical storage makes washing, drying, and folding more pleasant.”
Conclusion
Transforming a narrow corner into a reliable worktop makes daily chores faster and less stressful. ,
Creating a custom folding table is a rewarding project that improves how a laundry room functions in the home. By planning the design, checking height and clearances, and choosing durable material, a simple build lasts for years.
A compact table or wall shelf can free floor space and save time each week. Small DIY projects deliver big returns when they match the room’s measurements and intended use.
With the right plan, tools, and a clear layout, anyone can add a neat, useful station that keeps tasks organized and reduces daily stress.