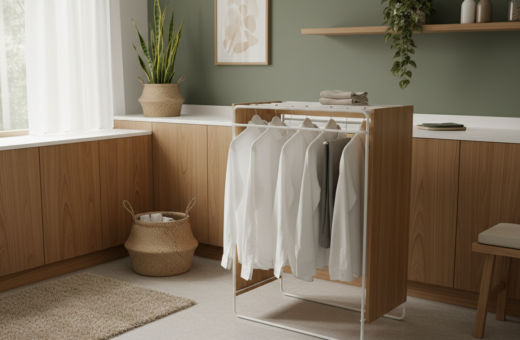
As of the May 2025 update, compact solutions are reshaping how people handle clothes in tight homes. A smart, mounted surface creates a neat folding station inside a small room. It saves steps and keeps a home organized.
Residents add a simple, built-in work surface to the laundry room to manage tasks without carrying baskets between floors. This DIY approach needs just a few hardware items and basic tools, so it fits many budgets.
Key benefits include a tidy space for folding, a sleek look that matches modern décor, and the option to put the surface away when not in use. Families find that a dedicated folding area makes chores much easier and faster.
Whether combined with a bathroom or tucked into a closet, this design turns clutter into a useful spot. It helps keep clothes handled with care and makes the most of every square foot.
Assessing Your Laundry Room Space
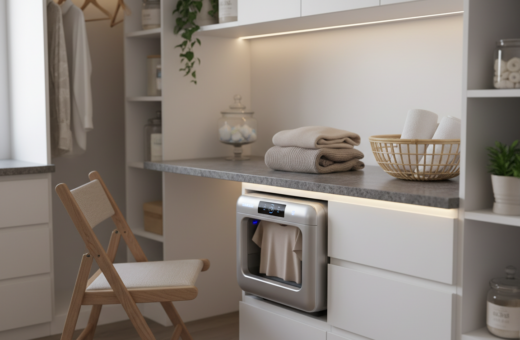
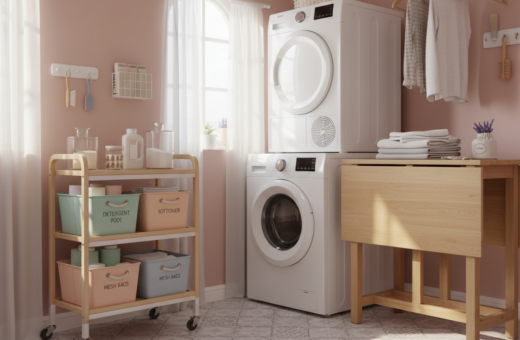
Small apartment layouts demand smart planning to make everyday chores efficient. A quick, careful survey of the room helps set realistic expectations before any DIY projects begin.
Optimizing Small Apartment Layouts
Measure twice, plan once: note the distance between the washer and dryer, door swings, and any bathroom fixtures nearby. Ensure the proposed table built-in unit clears appliance doors and leaves walking space.
Design for three baskets under the unit to keep clothes off the floor and streamline sorting. Using vertical storage and open shelves preserves floor space and improves workflow.
Practical tip: sketch the room at scale on graph paper or use a free app. That makes it easier to test different storage and room folding table options without cutting wood first.
“A well‑planned work area can reduce steps and speed daily chores.”
- Reserve enough floor space for movement and basket access.
- Prioritize storage and clear workspace for laundry folding tasks.
- Verify compatibility with an adjacent bathroom if present.
Essential Supplies for Your Fold Down Laundry Table
Gathering the right supplies prevents delays and builds a strong, lasting work surface. Start with a 3/4″ 2′ x 4′ MDF sheet for the top; it provides a smooth, stable surface for folding clothes and everyday use.
Next, collect heavy-duty door hinges, corrosion-resistant screws, and mounting hardware rated for the intended weight. They keep the mechanism secure and the top level when open.
Also include enough lumber to build a solid frame and simple supports. A few quality brackets and a drop-stop latch increase safety and longevity.
- 3/4″ 2′ x 4′ MDF sheet as the primary top
- Door hinges, screws, and mounting anchors
- Wood for a stable frame and adjustable supports
- Storage bins or baskets to organize clothes under the work surface
Final tip: double-check the list before shopping so the DIY project finishes quickly and the room stays organized for years.
Preparing the Wall and Mounting the Base
A secure, level mounting base is the foundation of any successful folding area in a compact room.
Locating Wall Studs
Before mounting the laundry folding table, use a stud finder to mark studs behind the washer dryer. Anchoring into studs ensures the base carries weight safely.
Ensuring a Level Surface
The ledger board should sit at a height of 35″. A 2″ x 4″ piece wood makes an ideal ledger to support the countertop when the surface is in position.
Tip: place the side of the board flush to the wall and verify it is perfectly level. Each inch of the mounting board must be fastened into studs to avoid wobble.
- Check that mounting supplies match the wall type and intended load.
- Fasten with corrosion‑resistant screws and anchors rated for the washer dryer area.
- Confirm level one more time before attaching the laundry folding table hardware.
Safety note: proper wall prep and a solid ledger extend the life of the DIY project and make folding work smooth and reliable.
Constructing the Folding Mechanism and Table Legs
Careful measurement of each hinge point and leg position ensures the countertop operates cleanly and tucks away flat. Start by confirming the ledger height and marking points for the leg hinges along the underside of the board.
Set leg height to 35 1/2 inches so the support legs line up with the ledger and give a level work surface. For an extended run, choose a butcher block or durable countertop that spans up to 88 inches to hold multiple laundry baskets and heavy loads.
Use offset hinges so the mechanism rests flush against the wall when closed. Attach the hinges to each leg and the underside of the top piece, then tighten fasteners that match the wall anchors and load ratings.
- Measure each piece twice and cut to match the ledger spacing.
- Secure legs to the underside with bolts or screws for robust storage support.
- Test the folding action several times to confirm smooth operation and correct alignment.
Tip: align every leg to avoid gaps under the countertop and check that the support clears any baseboard or trim before final mounting.
Adding Finishing Touches and Fabric Covers
A fabric cover and a fresh coat of paint can turn a simple counter into a durable, attractive workspace for sorting and folding. These final steps protect the wood and make laundering chores much easier in a tight space.
Selecting Durable Fabrics
Choose a heavy cotton or canvas that resists moisture and abrasion. A washable cover keeps the countertop looking new and reduces snags when organizing clothes.
Painting Wood Surfaces
Seal and paint the piece wood with a moisture‑resistant primer first. Use enamel or water‑based polyurethane overcoat to protect the counter top and legs. Painting the legs to match the top creates a cohesive look.
Managing Fabric Overhang
When covering the table top, make sure to leave at least a 3 inch overhang to pull fabric tight and staple securely. Trim excess and tuck the side for a neat finish so covers can be put away or used without snagging.
- Use a butcher block or solid wood piece for the countertop for long‑term durability.
- Keep fabric smooth and wrinkle‑free to make folding clothes much easier.
- Once paint is dry and the fabric is secure, the room folding table is ready for daily use.
Conclusion
Conclusion
Smart planning turns small rooms into efficient chore zones. By following clear steps, one can build a durable laundry folding table that fits a tight apartment and eases daily routine.
The project rewards careful material choices and proper mounting. Sturdy table legs and secure hardware keep the work surface stable under heavy loads.
With basic tools and measured planning, this DIY project proves that even a modest room can host a professional‑grade laundry folding table. It keeps the bathroom and adjacent spaces organized and functional.
They will find that a well‑made station speeds tasks and makes upkeep simple. Use this guide as a roadmap to complete the project and enjoy smoother chores at home.